The Tip Jar #1 - Homemade Marmalade

First up,
Homemade Marmalade
In our first instalment, co-founder and London's very own Queen of Jam, Sky, guides you through making good marmalade at home. With a few tips and tricks, it can be a simple and delicious preserve to make. And now is the time to give it a go! Seville oranges are in season 🍊
Here's what you'll need:
- About a kilogram of Seville Oranges
- The same amount of granulated sugar
- A pressure cooker or a large saucepan
- A Friday night
- A Saturday afternoon
- A Sunday morning
When looking forward and planning a project like making marmalade, I suggest considering it in the same way that you would approach making sourdough bread for the first time. Give yourself time to look, to feel, and to evaluate. Don’t put yourself in a position where you feel like you must rush.
Cutting and processing oranges can be messy. If you try to do it all in one day, before you know it, you’re ploughing through your Seville orange haul when your child or partner comes into the kitchen foraging for food or luring you to the pub. The floor is sticky with juice, your hands are stinging and inflamed from the acid and you’re still only halfway through.
Because of this, I suggest the first ingredients you need for your recipe are 10 minutes of Friday, 1 hour of Saturday, and a further hour of Sunday. It is optional, but I would thoroughly recommend accompanying your time with a handful of good podcasts or albums and a glass or two of wine.

Here's how to make it:
Friday Evening - Cook the oranges whole
I do this for three reasons:
Firstly, if you cut the oranges raw it’s hard work, takes longer, and is messier.
Secondly, for all my talk of relaxed creativity, I can get obsessive. When one cooks the oranges raw they separate off the pips, tie them in a piece of muslin, and stew with the peel. But when the muslin is removed, it is full of the pectin, the seeds are packed with it and I find myself wanting to spend time scraping it off. However, when you cook the fruit whole the pectin is usefully absorbed into the pulp of the fruit.
Thirdly, (this is probably the most important reason) to keep your water. When making marmalade for the first time, people often end up with two unsatisfactory results. A thick, toffee-ish caramelised marmalade or something completely soupy! By keeping the water you cook the oranges in separate from the fruit, it becomes easier to control and easier to decide how much you want in the mix.
I use a pressure cooker, but if one isn’t available it doesn’t make any difference - it just takes longer. Put your whole fruit in the pan with a couple of pints of water (mine didn’t cover halfway) and cook until you can pierce with a knife without resistance. Leave to cool overnight.
Your oranges are now cool. Take them from the cooking water. Cut them in half and remove the seeds. At the same time pull out the pulpy fruit, put it in a bowl, and leave it to one side. Now cut your peel. This is entirely up to you as to how you want it. Fine, thick, square - it really doesn’t matter and this can be a big part of how you make the marmalade your own.
Once done, it is time to candy the peel. Weigh the peel and then place in a pan with equal amounts of sugar. Turn on the heat until you begin the see bubbles appear and then immediately take it off the heat. You don’t want to risk any caramelisation. You just want to heat it up to aid the transfer of sugar into the peel. You can now cover and leave overnight.
Sunday Morning - Patience is key
Now, this is the day for really connecting with your patience, taking your time and allowing all your senses to help you evaluate as you go. You have your peel beautifully candied. It should be glistening and translucent.

Weigh the fruit pulp and add it to the candied peel. You will now have a very thick and viscous mixture. Depending on how clear and well-distributed you want your peel, you add more or less of the orange cooking water.
It is important to weigh your water as you add and stir. A good tip when you don’t know how much liquid you are going to add is to weigh your liquid at the beginning and then weigh what is left at the end.
For the amateur marmalade maker, it is easier to err on greater viscosity. At this point I often like to get my hands involved. Feel the mixture. You can add bits of water at a time to make sure that you don’t overdo it. If you get close to a point where you think your mixture is turning towards liquid, you should stop, and you may want to consider boiling off a bit of water before adding your final sugar. But try not to get to this point.
If your mixture is really thick and viscous before you add the rest of your sugar you will find it very easy to get a set.
Now you have your final mixture, add the weight of your pulp to the amount of cooking water. This will be the amount of sugar you now want to add.
Overall, you should end up with 50% oranges and 50% sugar. By gently boiling you will take the mixture to over 60% sugar. Although this sounds very high and is far more than we have in our jams, because of the high acidity in Seville oranges you still end up with a beautifully tart marmalade.
D.H. Lawrence once said:
"I got the blues thinking about the future, so I left off and made some marmalade"
We feel you, David.
Gently start to heat the mixture whilst stirring, allowing the sugar to fully dissolve. Once dissolved, increase the heat to bring the marmalade to a rolling boil, stirring occasionally. Whilst it heats put a couple of small plates in your fridge for the testing stage.
Once the rolling boil is achieved set a timer for 5 minutes. When the timer goes off take the pan off the heat. Make a sample by putting a teaspoon of marmalade on one of the cold plates.
Time to jar it up.
Have your jars and caps ready to one side, with a jug and ladle.

When you have left the sample for approximately 5 minutes in the fridge, it is then time to look. Draw your finger in from the side. You are looking for the marmalade to stay together and when you take your finger away there should be the shape of passage left behind. Another tip to look for is that while you have been waiting for your sample to cool your pan of marmalade will also have started to cool. If you insert your spoon and pull gently the surface of your marmalade should start to wrinkle.
If you are not happy with the progress, you will be fine bringing the marmalade to a rolling boil again for another 3 -5mins. As long as you began with a viscous mixture it is very unlikely to need any longer than a second boil. And maybe not even that.
Now ladle your marmalade into your jug and pour into your jars. Screw on the cap and invert the jars for a couple of minutes. There is no need to pre sterilise as your marmalade is at 105 degrees and will sterilise the interior surface of the jar and cap within seconds.
Leave your jars aside to cool and set. They will be all ready for Monday morning.

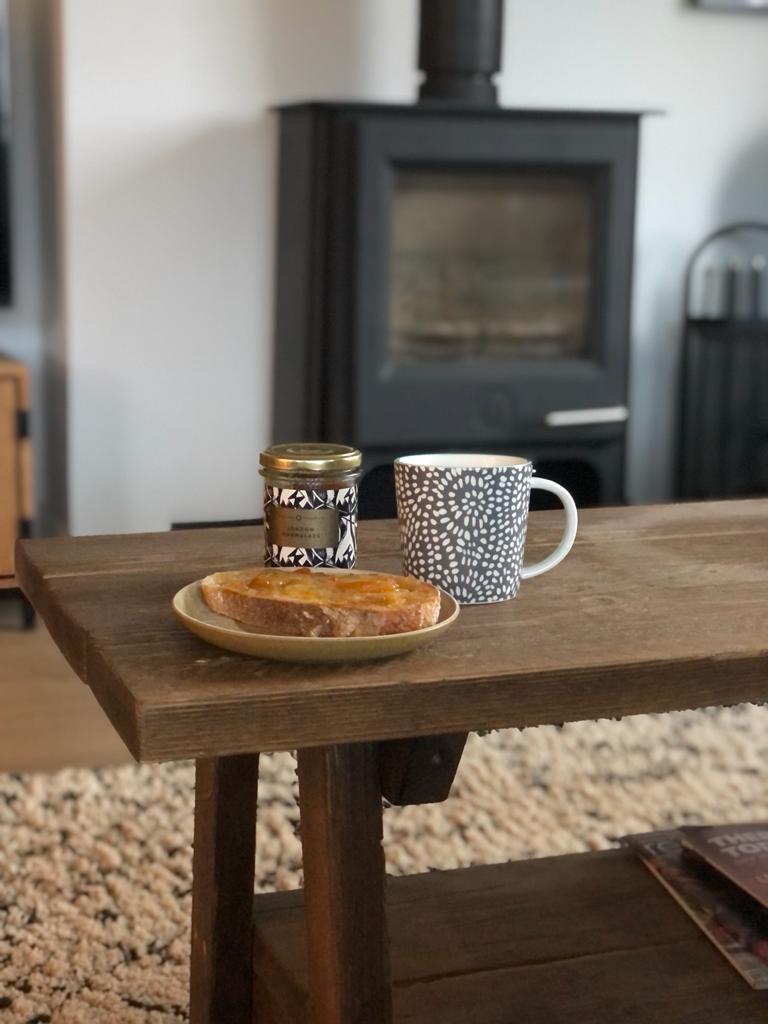
Some hot buttered toast with your own marmalade and a big mug of tea is a splendid way to begin a cold winter week.
| Ready for a taste test? |


Try our marmalades by clicking here
Thanks for reading, folks.
Bitter orange marmalade is a truly wonderful thing. To refer back to the great D.H. Lawrence, marmalade, more specifically, making marmalade, is a valuable healer of January blues. It is, in its very essence, sharp and bitter. You will endure hardship: cue sticky floors and stinging hands. But apply love, time, and curiosity and, sure enough, it will make you feel better. Give it a go.
| Best wishes, Sky, Kai & the England Preserves team |